Friday, January 8, 2010

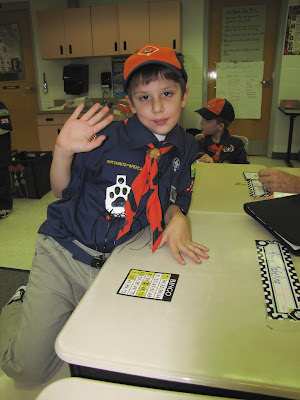
Getting closer to getting the Tiger Cub badge.


The boys have made some real progress with all their achievements to receive their Tiger Cub badge. They have completed Making My family Special, Where I Live and Keeping Myself Healthy and safe Achievement requirements.
Right before the holidays we completed, Keeping Myself Healthy and safe. For the safety category I had them plain a fire drill and practice it at home. For the healthy category I made a gigantic nutrition pyramid so the boys would get a real sense of the nutritional value of each category. I brought in a bag of plastic fruits, vegetables, breads and plastic Mc Donald’s food. They picked something out of the bag and placed it in the category they thought it belonged. Oddly enough they all picked the junk food and they really knew that it went right on top with the oils. We discussed how those things were not healthy and we started throwing them off the pyramid and vowed to eat less of the junk foods and more healthy foods.

Last evening we played bingo and I thought it would be a great confidence builder to let the boys conduct the game. They did such a great job taking charge and taking turns at the wheel.  They were all winners and received a toy.


Their homework is to discuss with a parent about what to do if they should become lost or separated from their family in a strange place. All we have left is How I Tell It and Let’s Go Outdoors.

PhotobucketPhotobucket

Thursday, January 7, 2010

Orginizing kids crafts

My craft room is going to be used for multiple things. Guest room, scrapbooking room and craft room. I cant forget the fact that when I am scrapbooking or crafting my son loves to join in on the fun. Since my thing are either very sharp or very expensive for him to use. I decided that setting him up with a small cornier in my crafting room would be the best thing for the both of us. I have been looking at all kinds of organizing systems for kids and they are off the charts expensive. So I decided I needed to come up with something creative without breaking the bank. Since he has paints, crayons, pencils, stamps, Etc. I thought that hanging a Shoe organizer on the wall would let him have all his things handy and help him have an organized space in my room.
These keep him busy for a long time. He enjoyed organizing all his crafts. 

This was a very inexpensive storage solution. For $8.99 it really worked well. I just might have to do this for some of my things.


Because the shoe organizer was to long I cut off the last two rows. I will save them and try to put them to use once the room is done 

 My husband put some wall anchors in the wall so it would hold the weight of the bag. 


Wednesday, January 6, 2010

I'm going sugar Free

Sugar Free Sweet Spiced Nuts

 This is a new year and I'm going sugar free. Since diabetes runs in my family I decided to make a change in some of my deserts. I was speaking to my Aunt Rosemarie over the holidays and she told me how she makes her sugar coated nuts. I also have a recipe for sugar coated Spiced Nuts. Her nuts are coated with egg whites mixed with Splenda and mine are coated with butter mixed with brown sugar. Now, I do not see a down side to my Aunt’s nut recipe. It is loaded with protein and no sugar. There is a small difference. Mine has a crispy candy coating and hers has a nice nutty sweet flavor. This recipe is perfect for someone who wants to watch their sugar intake. My husband loves my spiced nuts. When the Chief came home he spotted the jar of nuts and dug right in. I asked him if he noticed anything different. He shook his head no, and said not really. I then told him they were sugar free. He was shocked and grabbed another hand full. Based on my husband’s response I could say they are a hit.  This was so good next week I'm going to substitute the nuts with a Granola mix.  

Ingredients:

1 bag 16 oz. pecan halves
8 oz of roasted salted cashews
6 oz of Macadamia nuts
3/4 cup of Brown Sugar Splenda
1/4 cup of Splenda
1/4 teaspoon of cayenne pepper (optional)
2 teaspoons of cinnamon
1 tablespoon of pure vanilla
4 egg whites

Directions:
Separate egg whites from egg yolks. Add the Splenda brown sugar, Splenda, cayenne pepper, cinnamon and vanilla to the egg whites. Beat with a fork until it is mixed well. Put all the nuts in a bowl and pour the egg white mixture in with the nuts and mix well. Cover a baking sheet with quick release aluminum foil. Spread nuts evenly on baking sheet. Bake at 350 degrees for ten minutes. Toss nuts and bake again for an additional ten minutes. Let cool and they become slightly crispy.


Tuesday, January 5, 2010

Now for painting my new craft room!!

The color is sage green. After everything was all prepped we got the painting done in about two hours.
This was one of those rare occasions where the Cisco Kid could paint pictures on the walls. He was so happy!!!


As you can see my little helper backed up into one of the freshly painted walls.

Now we are waiting for the floors to come in. 


Once the floors are down we will be able to put back the floor molding.  I'm ready to start putting up some shelving and cabinets.  

Monday, January 4, 2010

The demolition starts!!!

Over the weekend we started the demolition of the guest bedroom. My plan is to take down the wallpaper trim, paint the room a sage green to match the rest of the house, remove all the floor molding so we could put down wooden floors, convert the closet into a counter workspace for all my electronics and create a work space for the Cisco Kid. We have ordered a Murphy bed so it can convert into a guest bedroom.

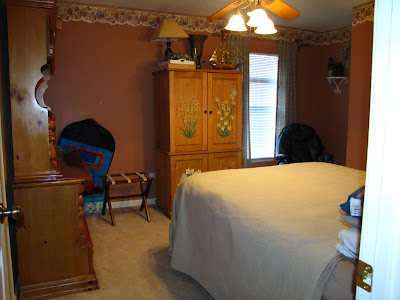
This is the room before we started the demolition.   


My men are removing all the molding and the tack stripping around the walls so the wooden floors can be installed.

The closet will be turned into an open work space.


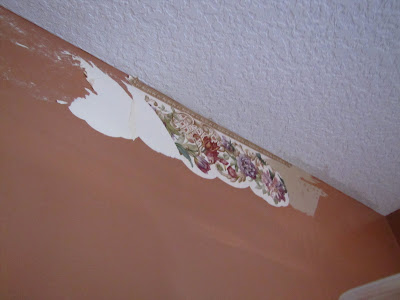
I thought removing wallpaper was going to be a long messy job. I was surprised it was so easy. I started by tearing the paper off the wall. It left the under lying paper that is glued to the wall. I then took a big sponge and wet the paper. By wetting the paper it wet the glue and I was able to peal and whip it very easily off the wall. It cleaned up really easy.    

This is the paper dry.

This is the paper wet and ready to peal.

Next we have to paint.

LinkWithin

Related Posts with Thumbnails