Friday, October 16, 2009

Continuing Paper Mache Pumpkins

Yesterday I posted the recipe and instructions for the paper mache pumpkins. Here is the ending result.

Now that they are nice and dry I cut the 3 inch hole at the top and bottom. Pointed side up. By cutting the hole at the bottom they now sit nice and flat and you can put a candle in them. I recommend the little imitation batteries operated candles.
Cut face out with scissors or exacto knife.

Paint them orange. Two or three coats of paint will be needed.

After paint has fully dried, they were sealed with clear polyurethane spray
We painted the eyes black.

Stop over at Kellys Korner to see many more talented people.
PhotobucketPhotobucket

Thursday, October 15, 2009

A belated birthday lunch with a dear friend.

I can still celebrate like I'm 21. Dancing, drinking, late night breakfasts, Oh! Who am I kidding? When I was 21 I started celebrating my Birthday at 9: p.m. and didn’t stop until the sun came up. Now my birthdays still last the same amount of hours but its spread out over one week. No more Dancing into the wee hours. No more drinking and definitely no late night breakfasts. Now my friends call me and say meet me for breakfast at 10: a.m. Just goes to show you what 40 something looks like. Because of our busy schedules, one of my dear friends Rebecca took me out for a belated birthday breakfast. This was definitely a trade up from the old days. We went to Mimis Cafe. I have never been there before and it was delicious.

Tuscan Frittata
Capresse Omelette: I met the Chief for lunch and since Mimis Cafe was near where he works, I thought it would be a great place for us to eat. This is what the Chief had.
Pineapple Coconut Muffin. Need I say more!!!!
Rebecca knows how much I love the presentation of food and this will look so perfect at Thanksgiving with some of my favorite deserts.
Thank you so much.
PhotobucketPhotobucket

Paper Mache Pumpkins

During Grandma and Grandpas visit last weekend we decided to make Paper mache Pumpkins.

Recipe for the glue
3 cups of all purpose flour
12 cups of water


Materials needed
12 inch balloons
2 newspapers cut into 2 inch strips.
scissors
Orange and black paint
1 can of Polyurethane clear spray
Containers are needed for the balloons to stand in.

I took three cups of All Purpose Flour and six cups of water. Mix them together until the flour was dissolved. Then I boiled six cups of water and added the flour and water mixture to it. I let it cook until the mixture thickened. Once it cools down put the mixture in a large bowl. Blow up your balloons and you are ready to start covering your balloon with newspaper. Dip the strips of newspaper in the glue and wipe off excess with your fingers. Place strip on balloon. Keep this up until the balloon is fully covered and at least six strips of paper thick.


We started out using paper bags and quickly found out the paper was too thick.


Tomarow I will post the completed pumpkins.

Thank you Kim and Heather for your great post about your children and their cute life adventures. There is still time to read all about their posts on "What would your children say?" Wednesday.
PhotobucketPhotobucket

Wednesday, October 14, 2009

Who is missing who more

Here we are again. There is no end to what these little ones can come up with. All the funny and hilarious things they say come to them so naturally. Go to "What would your children say?'Wednesday and see how you can join.

As my men go camping in the barn again, the Cisco Kid and I tell each other how much we will miss each other. This is how it went.

Me: I will miss you.
Him: I will miss you more.
Me: No, I will miss you more.
Him: No, I will miss you more than you will miss me.
Me: Oh!!!! I love that, but I will definitely miss you much more.
Him: Yeah you’re right you will miss me more.
Me: Great!!! All that loving didn't last long.


PhotobucketPhotobucket

Tuesday, October 13, 2009

Give me your two eye teeth

WARNING!!! I am posting this for documentation purposes. If you can't look at loose teeth don’t read past The Cisco Kid sitting in the chair.
My poor son went to the dentist and he recommended we have the Cisco Kids two eye teeth removed. There is not enough room in his mouth for his permanent teeth to grow in. Pulling the two eye teeth will be the best thing for a temporary fix right now. If we don’t have his eye teeth removed they might become impacted. Braces will be needed when he is twelve. I agreed to the procedure and then I was informed that I would not be allowed in the room with my son as they pulled his teeth. As I stood there in shock, they assured me that everything would be ok and it was a very simple procedure. That didn't make me feel any better.
I reluctantly left the room.

It's hard to believe these large teeth came out of my little baby's mouth. Next to the large eye teeth is one of his recent baby teeth.
Yesterday we had the procedure completed and the Cisco Kid is doing just fine. He is back in action.
PhotobucketPhotobucket

Monday, October 12, 2009

Neapolitan Cookies

This is the Eighth of twelve posts from my Family Heritage Christmas cookie recipes. Every Monday from now until December, I will share my full collection of Christmas cookie recipes with you. This is a sneak peak at the next four.

My Christmas cookie collection consists of twelve different kinds of cookies. Every year I bake over 500 cookies and give them to our family and friends.

I have already posted about my Almond Crescents, no cook S’mores, Almond cups , Coconut Macaroons, Crisp sugar cookies, Chocolate Dipped Lady Fingers, and Oat Rageous Chocolate Chip Peanut butter.


1 cup butter
1-1/2 cups sugar
1 egg
1 tea. Vanilla extract
2-1/2 cups all-purpose flour
1-1/2 tea. baking powder
1/2 tea. salt
1/2 tea. Almond extract
1/2 cup sliced almonds
red food coloring
1 square unsweetened baking chocolate, melted
2 tablespoons of poweder coco
1 tablespoon of strawberry extract.

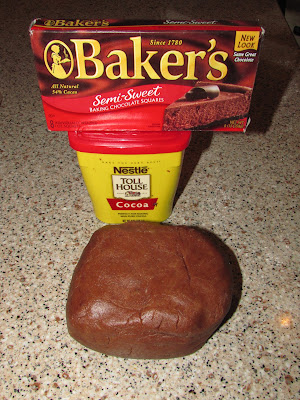
Line a 9 in x 5 in 3 in. high loaf pan with waxed paper. Set aside. Cream butter and sugar. Beat in egg and vanilla. Combine flour, baking powder and salt. Gradually add to the creamed mixture. Divide dough into thirds. Add strawberry extract and red food coloring to one portion, Spread evenly into prepared pan. Add almonds and almond extract to second portion, spread evenly over first layer. Add melted chocolate and coco to the third portion. spread over second layer. Cover with waxed paper, Refrigerate overnight. Unwrap and cut loaf in half length-wise. Cut each portion into 1/8 inch slices. Place 1 inch apart on ungreased baking sheet. Bake at 350 degrees for 10 to 12 minutes or until edges are firm. Remove to wire rack. Makes 4 dozen.


 PhotobucketPhotobucket

LinkWithin

Related Posts with Thumbnails