
I have already posted about my Almond Crescents, no cook S’mores, Almond cups , Coconut Macaroons, Crisp sugar cookies, Chocolate Dipped Lady Fingers, and Oat Rageous Chocolate Chip Peanut butter, Neapolitan Cookies.
My Christmas cookie collection consists of twelve different kinds of cookies. These are all family favorites. Every year I bake over 500 cookies and give them to our family and friends.
 My mother called these cookies Rugalas. She made her dough with butter and cream cheese. I found it hard and time consuming to work with the dough. Pillsbury makes a pie crust that you can roll out and it is very easy to use. These cookies taste just as good.
1 Pillsbury Pie Crusts (Pre Made) 2 rolls in a box.
1 can of SOLO Almond Cake & Pastry Filling.
1/2 cup of chopped almonds
1/2 cup of brown sugar
2 tbs. cinnamon
Combine the cinnamon and brown sugar together and set aside.
Roll out pie shells and spread 1/3 can of Almond Filling over Pie Shell. Spread close to the edge. Sprinkle Cinnamon mixture lightly over top of Almond Filling then lightly sprinkle chopped Pecans on top of that. Using a pizza cutter cut into 16 pieces. Just as you would cut a Pizza. Roll all 16 pieces. Starting from the end and roll towards the center giving you the crescent look. Once rolled, dip top of crescent into the leftover cinnamon mixture. Bake on 350 for 20 minutes or until the crescent looks opaque white.

 Unroll the pie crust.
 Spoon a large heaping tablespoon of Almond Pie filling onto pie crust.
 Spread to the edge. These come out great when the Almond pie filling is spread thin.
 Cut with a pizza cutter into 16th's. Cut the crust into 1/4th's then 8th's then 16th's.
 Roll starting from the outside working toward the center.
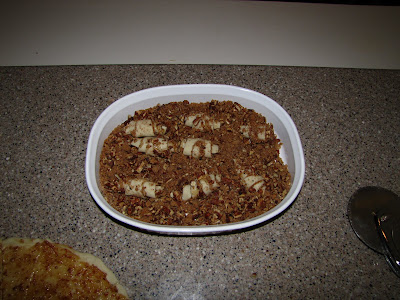
 Once they are rolled put in the nut, sugar and cinnamon mixture.
 Place on lined cookie sheet and bake.


 Tuscan Frittata
 Capresse Omelette: I met the Chief for lunch and since
  Pineapple Coconut Muffin. Need I say more!!!!
 Rebecca knows how much I love the presentation of food and this will look so perfect at Thanksgiving with some of my favorite deserts.
 Thank you so much.


